Execute remote command
api
The TerminalAPI.CommandStream API enables clients to execute commands or fully fledged terminal sessions on a remote machine.
There are two components that make this possible, the terminal-server and the terminal-client.
The terminal-server is a process that runs on the remote machine and listens for commands from terminal-clients.
The terminal-client uses the TerminalAPI.CommandStream API to send commands to, and receive responses from, the terminal-server.
The Volt CLI provides a terminal-client command that can be used out of the box, or you can use the API directly in your own code.
permissions
The terminal-client process must have volt:command-invoke permission to the terminal-server resource.
terminal-server cli
Every Volt has a built-in terminal-server resource if the “enable terminal server” option is enabled in the Volt settings. You can use the @__terminal-server alias to access this resource.

Alternatively, you can start a terminal-server manually on any machine, for example:
volt terminal-server @demo-terminal-serverThis will use the currently configured Volt CLI credentials to start a terminal-server with the alias @demo-terminal-server on the target Volt.
If you omit the resource id or alias argument, the CLI will create a new terminal server resource in the account ‘home’ folder and start it, writing the newly created resource id to the Volt configuration file:
volt terminal-serverAs usual, you can override the default configuration by passing in a different configuration file using the -c flag:
volt terminal-server @demo-terminal-server -c /path/to/config.jsonterminal-client cli
The terminal-client command can be used to connect to the terminal-server, send commands and receive responses.
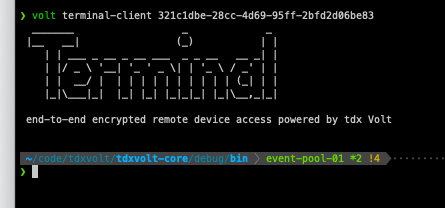
volt terminal-client @demo-terminal-serverThe example above will connect to the terminal-server with the id @demo-terminal-server using the current Volt CLI credentials. Since no command is provided, the terminal-client will enter an interactive mode, emulating a terminal:

To execute a remote command, use the -- flag to separate the command from the arguments.
volt terminal-client <terminal server id> -- <command> <arg1> <arg2> ...For example, to execute the curl -L https://www.google.com command on the terminal server @demo-terminal-server, run:
volt terminal-client @demo-terminal-server -- curl -L https://www.google.comYou can also use the -c flag to pass in a configuration file:
volt terminal-client @demo-terminal-server -c /path/to/config.json -- curl -L https://www.google.comThe terminal-client command will return the output of the command to the console.
For full usage, see:
volt terminal-server -hvolt terminal-client -hTo send commands to a terminal-server from you own code, see the examples below.
javascript
Use the TerminalAPI.CommandStream API to execute remote commands:
import { VoltClient, voltUtils } from "@tdxvolt/volt-client-web/js";const { fromBase64 } = voltUtils;
// Create and initialise the client.let client = new VoltClient();
/** * INSERT YOUR CONFIG HERE */const config = {  client_name: "...",  credential: {...},  volt: {...}};
try {  // Initialise the client with your configuration.  await client.initialise(config);
  // Get the terminal server resource you want to target.  const lookup = await client.GetResource({    resource_id: "@__terminal-server"  });  const terminalService = lookup.resource;
  // Specify the command to execute and its arguments.  const request = {    control: {      command: "curl",      arg: ["-L", "https://www.google.com"]    }  };
  // Create a command stream, targeting the terminal server resource.  const commandCall = client.CommandStream(request, terminalService);
  // Handle the output of the command.  commandCall.on("data", (payload) => {    const commandResponse = fromBase64(payload.data);    console.log("payload", commandResponse.toString());  });
  // Handle the end of the command.  commandCall.on("end", () => {    console.log("end");    client.close();  });
  // Handle any errors that occur.  commandCall.on("error", (err) => {    console.error("error", err);  });} catch (err) {  console.error("failure: [%s]", err.message);} finally {  console.log("finished");}